
Get low taper fade thick right
Before you sit in the chair, you need to understand the physical reality of thick hair. It is dense, heavy, and often resistant to lying flat. If you skip the prep, the barber spends the first twenty minutes just fighting the weight, and the final shape will lack definition. The goal is to manage volume from the start, not after the cut is finished.
Start with clean, dry hair. Many barbers prefer to cut thick hair when it is dry because wet hair clumps together, hiding the true density and texture. When dry, the hair stands away from the scalp, showing you exactly how much length needs to come off to create that clean taper without a bulky transition. If your hair is naturally wavy or curly, let it air dry completely before the appointment. Do not rely on styling products to mask the texture on the day of the cut; the barber needs to see the natural growth patterns to place the fade lines correctly.
Bring reference photos that match your hair texture, not just the style. A low taper fade on fine hair looks different than one on thick, coarse hair. Look for images that show the side profile and the neckline, focusing on how the fade blends into the longer hair on top. Avoid images with overly long top sections if you want a low-maintenance look; thick hair requires more frequent trimming to maintain the taper line.
The step-by-step process
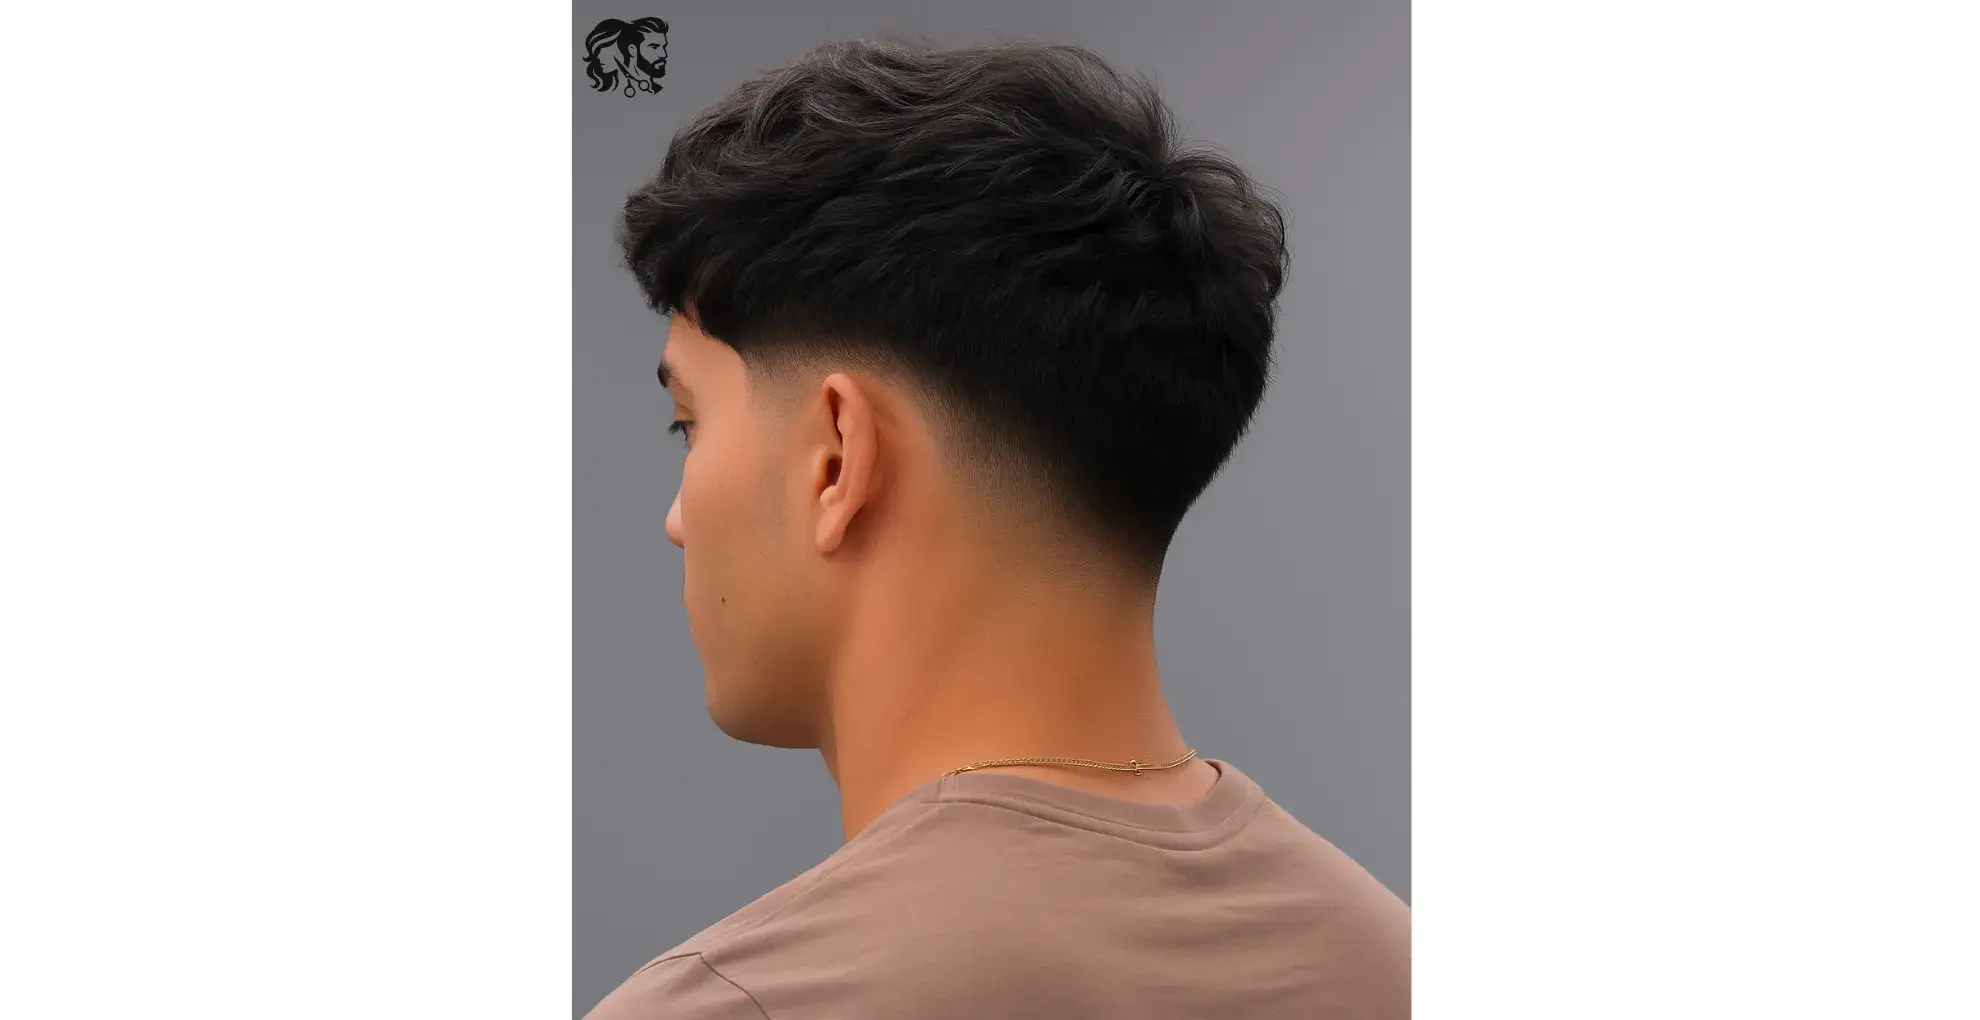
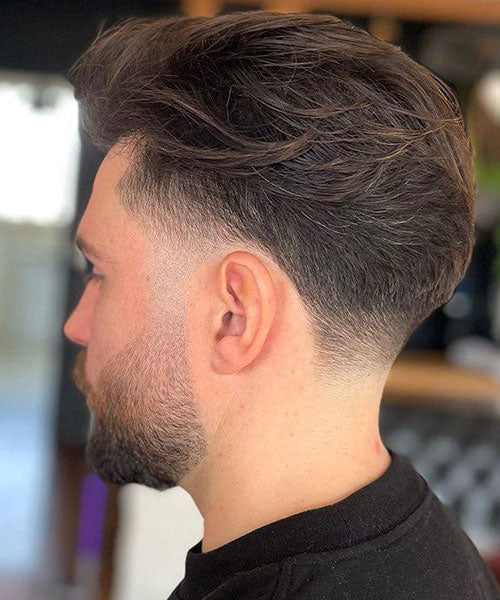
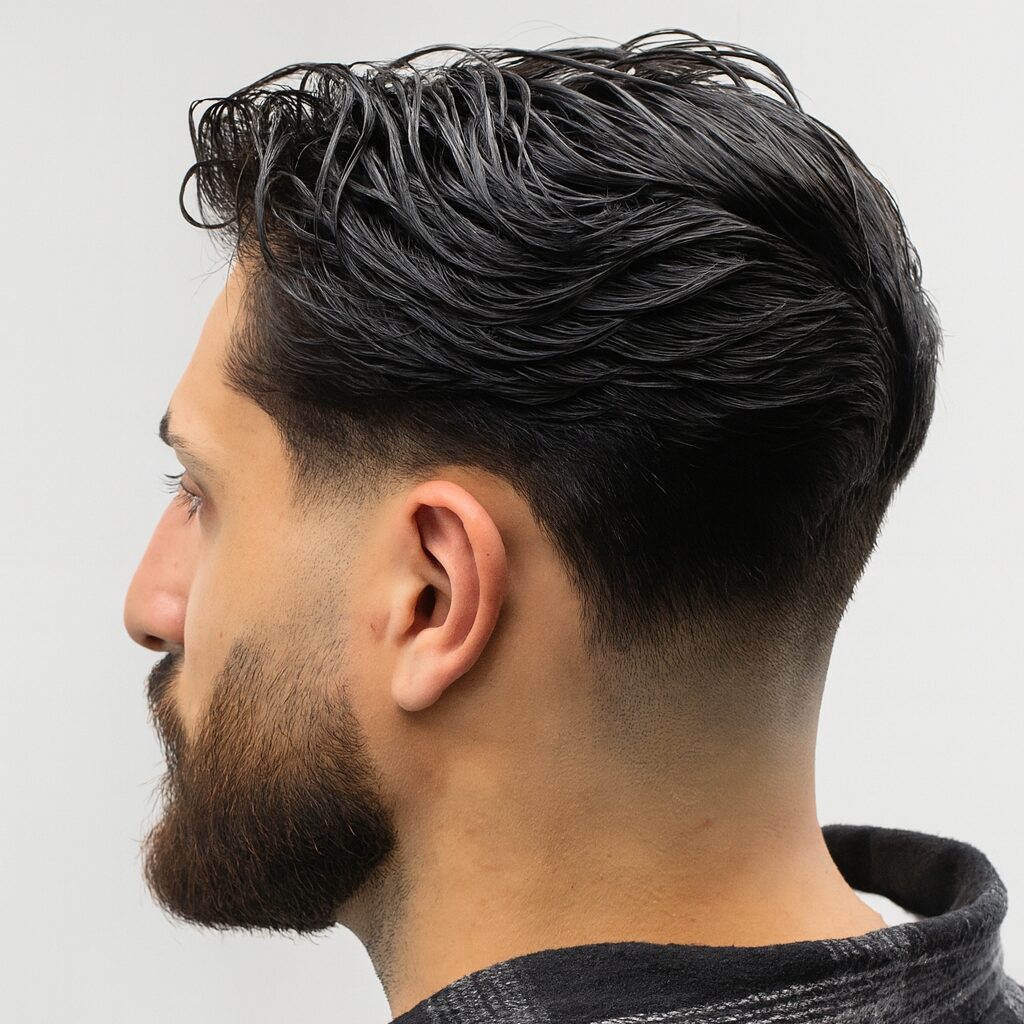
Achieving a low taper fade on thick hair requires managing density and weight. Thick hair tends to puff out or lose its shape quickly if not cut with precision. The goal is to remove bulk from the sides and back while preserving enough length on top to style. This process balances the heavy texture with a clean, gradual transition.
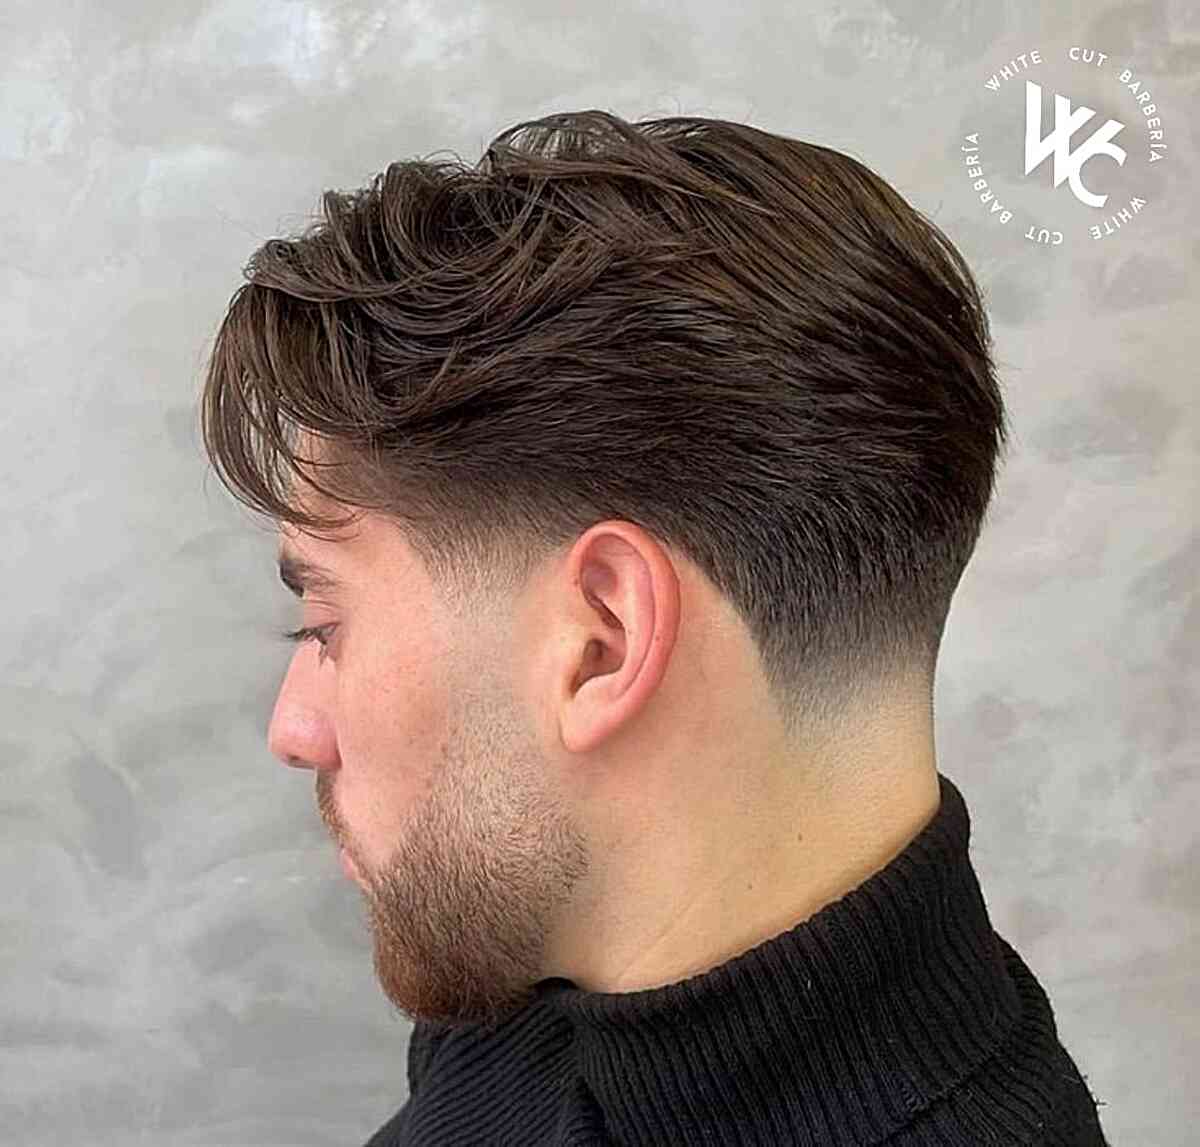
Start by identifying the starting point. For thick hair, the taper should begin slightly higher than on fine hair to prevent a bulky look. A standard low taper starts near the temple and ear, but you may need to raise the guideline to the mid-ear to reduce volume effectively. Use a comb to mark this line horizontally across the head. This baseline determines where the hair will gradually shorten.
Set your clippers to a longer guard, such as a #3 or #4, and work upward from the neckline. Thick hair holds its shape well, so you can remove significant length without exposing the scalp immediately. Use a downward scooping motion with the clippers to create a smooth gradient. Avoid straight vertical cuts, which can create harsh lines that are difficult to blend later. The goal is to create a soft, gradual fade that disappears into the skin.
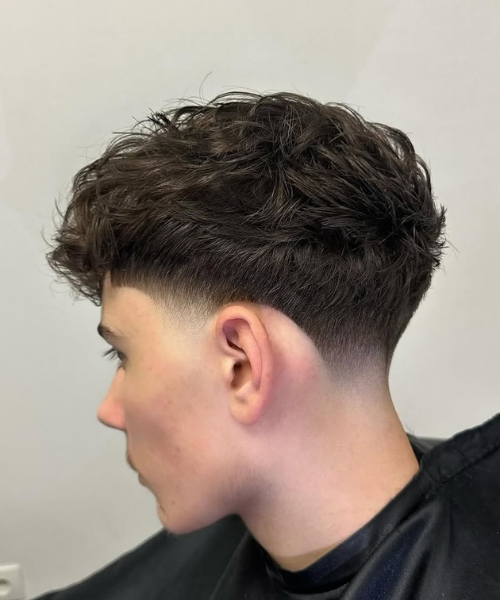
Switch to a shorter guard, like a #1 or #1.5, to blend the lower section into the skin. Use the clipper-over-comb technique to refine the edges around the ears and neck. This step is critical for thick hair because it removes the "shelf" effect that occurs when dense hair meets shorter sides. Work slowly and check the symmetry from multiple angles. The fade should be invisible to the touch, even if the visual difference is stark.
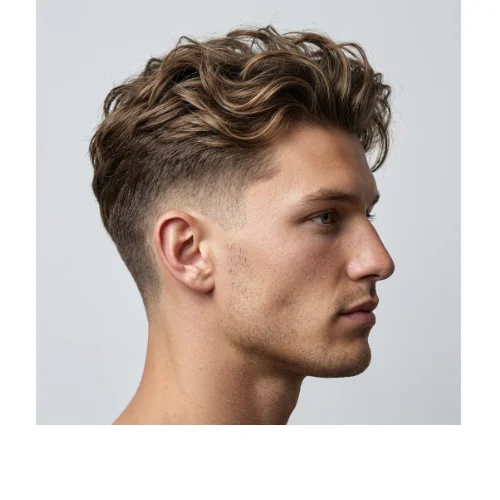
Leave the top section longer to balance the faded sides. For thick hair, cut the top with scissors using a point-cutting technique to remove weight without creating blunt lines. This adds texture and movement, which helps the hair lay naturally. If you have waves or curls, cut the hair dry or slightly damp to see how it falls. Trim the fringe to your desired length, ensuring it blends seamlessly into the sides without looking disconnected.
Use a trimmer to define the hairline around the forehead and ears. Clean up any stray hairs on the neck and cheeks for a polished finish. Apply a small amount of styling product to damp hair to check the shape. Thick hair often looks heavier when wet, so assess the style when it is dry or nearly dry. Make any final adjustments to the fade or top to ensure balance and symmetry.


As an Amazon Associate, we may earn from qualifying purchases.
This sequence ensures a clean, modern look that works with your hair’s natural density. The key is patience during the blending phase, as thick hair requires more careful layer removal to avoid a choppy appearance.
Common Mistakes to Avoid
A low taper fade is straightforward in theory but fragile in execution. With thick hair, the margin for error shrinks because density amplifies every mistake. The sides can balloon out, the taper can look uneven, and the top can feel heavy and disconnected. These issues rarely appear in the mirror immediately; they show up after a few days of growth or when the hair is styled incorrectly.
Leaving the Taper Too High
The most frequent error is setting the fade line too high. When the fade starts near the temple or above the ear, it cuts into the natural hairline rather than complementing it. For thick hair, this creates a harsh, disconnected block of volume on top that feels heavy and boxy. The taper should start low, following the natural curve of the ear and the nape of the neck. This preserves the hairline’s integrity and allows the thick hair on top to flow down naturally without a sudden drop in volume.
Over-Blending the Transition
Thick hair has a tendency to push outward, creating a "mushroom" effect if not managed. Many barbers over-blend the transition zone, removing too much length to create a soft gradient. While this works for fine hair, it leaves thick hair with no structural anchor. The result is a flat, shapeless top that lacks texture. Instead of blending everything into oblivion, leave enough length in the transition zone to create a smooth but distinct shift from the short sides to the longer top. This maintains the haircut’s shape and prevents the sides from looking like they are swallowing the top.
Ignoring the Neckline
A messy neckline ruins the precision of a low taper fade. Thick hair at the nape grows quickly and can look unkempt if not trimmed cleanly. A rounded neckline is standard for most face shapes, but it must be sharp and consistent. A jagged or overly squared neckline creates a visual disconnect that draws attention away from the clean fade. The barber should use a trimmer to define the hairline with a clean, natural curve that follows the jawline’s end. This small detail keeps the haircut looking fresh and intentional for longer.
Skipping Texture on Top
With thick hair, the temptation is to leave the top completely uniform. This creates a heavy, helmet-like appearance that lacks movement. A low taper fade relies on the contrast between the clean sides and the textured top. The barber should point-cut or texturize the top to remove bulk and create separation. This allows the hair to lay naturally and makes styling easier. Without texture, the thick hair will just sit there, fighting against the clean lines of the fade.
Using the Wrong Products
Thick hair often requires hold, but many men reach for heavy pomades that weigh the hair down. This defeats the purpose of the fade, which is to look light and sharp. Instead, use a light hold product like a sea salt spray or a matte clay. These products add texture and volume without making the hair look greasy or stiff. They allow the natural movement of the thick hair to show through, keeping the style looking modern and effortless.
Waiting Too Long Between Cuts
A low taper fade is a precision cut that relies on sharp lines. Thick hair grows quickly, and the fade can lose its definition within two weeks. Waiting too long between cuts allows the sides to grow out, blurring the taper and making the haircut look sloppy. For thick hair, a trim every two to three weeks is ideal to maintain the shape. This keeps the fade crisp and the neckline clean, ensuring the haircut always looks intentional.
Low taper fade for thick hair: what to check next
Thick hair brings volume and texture, but it also demands a precise cut to avoid looking bulky. A low taper fade manages that density by keeping the sides and back tight while leaving the top full. Here are the practical answers to the most common concerns.
These adjustments ensure the cut remains functional and stylish as your hair grows out. The key is maintaining the balance between the tight taper and the voluminous top.
No comments yet. Be the first to share your thoughts!