

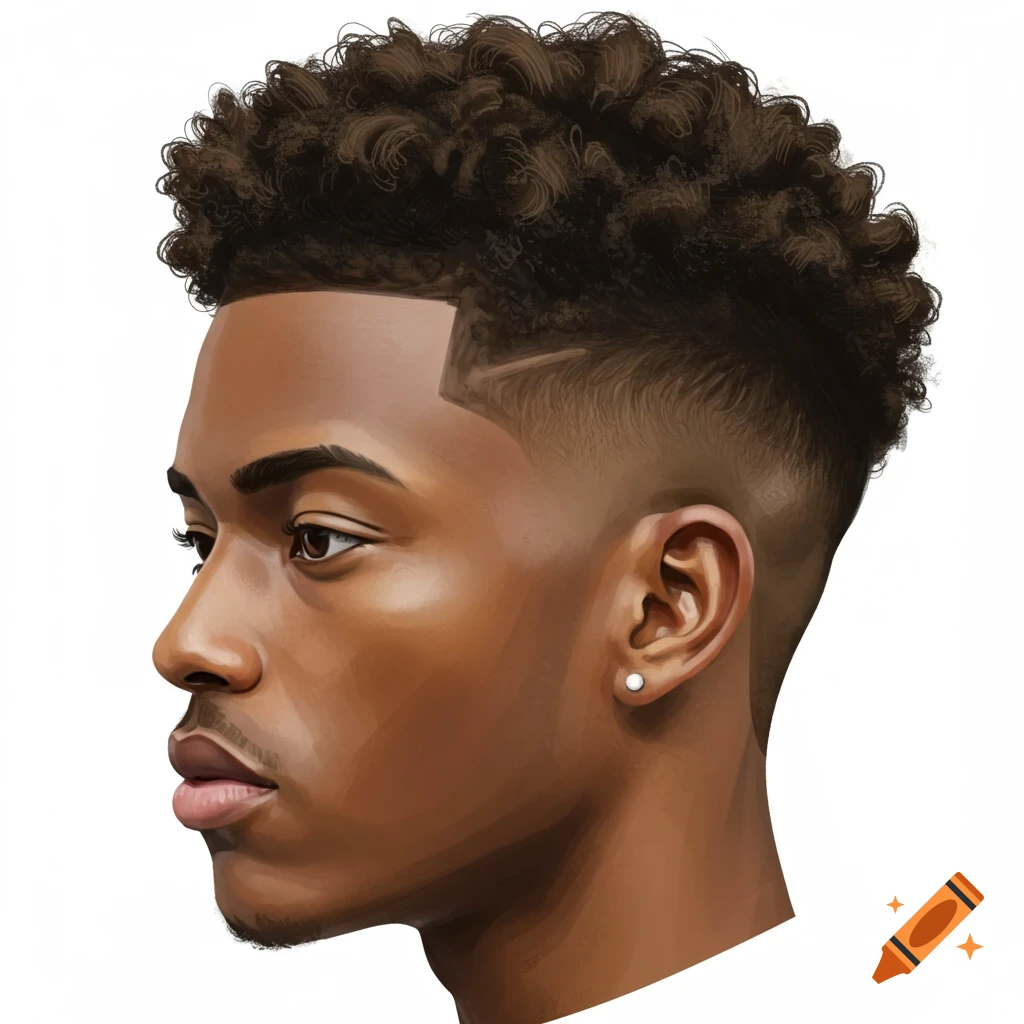
Get mid taper fade curly right
Before you sit in the barber’s chair, a few practical details determine whether the cut holds its shape or fades into a fuzzy mess within a week. The mid taper fade for curly hair relies on a clean gradient that respects the natural curl pattern, so preparation is as important as the scissors work.
Start with clean, product-free hair. Barbers need to see the true density and texture of your curls to map the taper correctly. If you have heavy buildup from gels or pomades, the hair clumps together, making it difficult to gauge where the fade should begin. A simple wash with a clarifying shampoo removes this barrier without stripping the scalp.
Conditioning matters, but avoid heavy leave-ins that weigh curls down. Light hydration keeps the hair manageable for cutting, but thick oils or butters can cause the clippers to slip or pull. Ask your barber if they prefer dry or damp hair. Some stylists cut curly hair dry to see the exact spring-back, while others prefer it damp for precision. Communicating this preference early saves time and reduces guesswork.
Bring reference photos that match your current length and curl type. A mid taper fade looks very different on 3A waves versus 4C coils. Showing a clear side profile helps your barber understand the desired fade height. It also clarifies how much length you are willing to sacrifice on top to achieve the desired contrast.
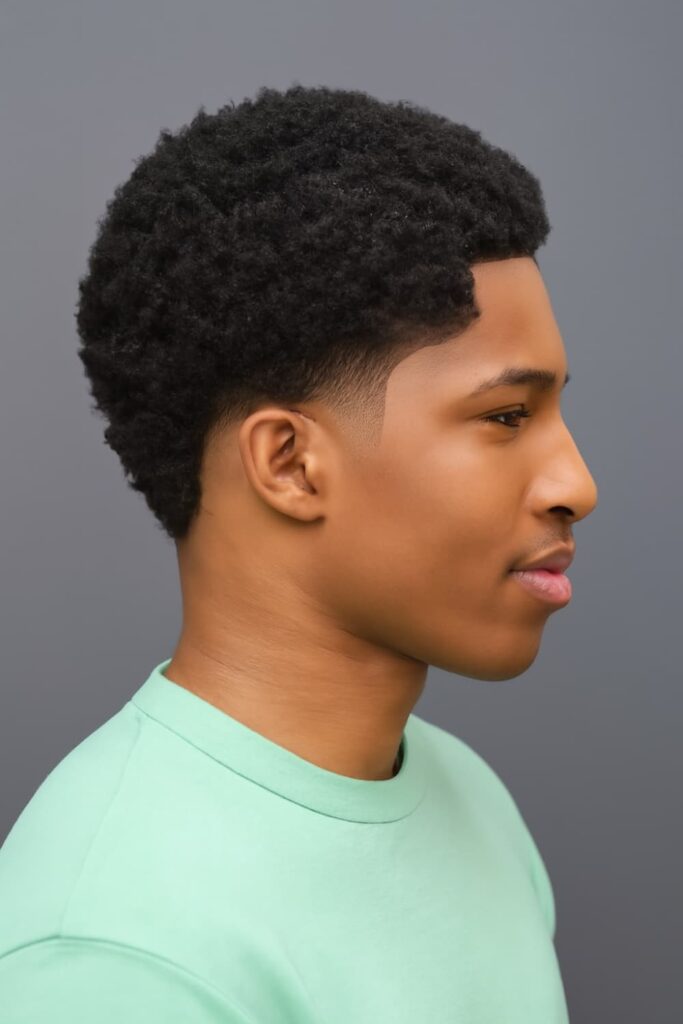
How to get a mid taper fade on curly hair
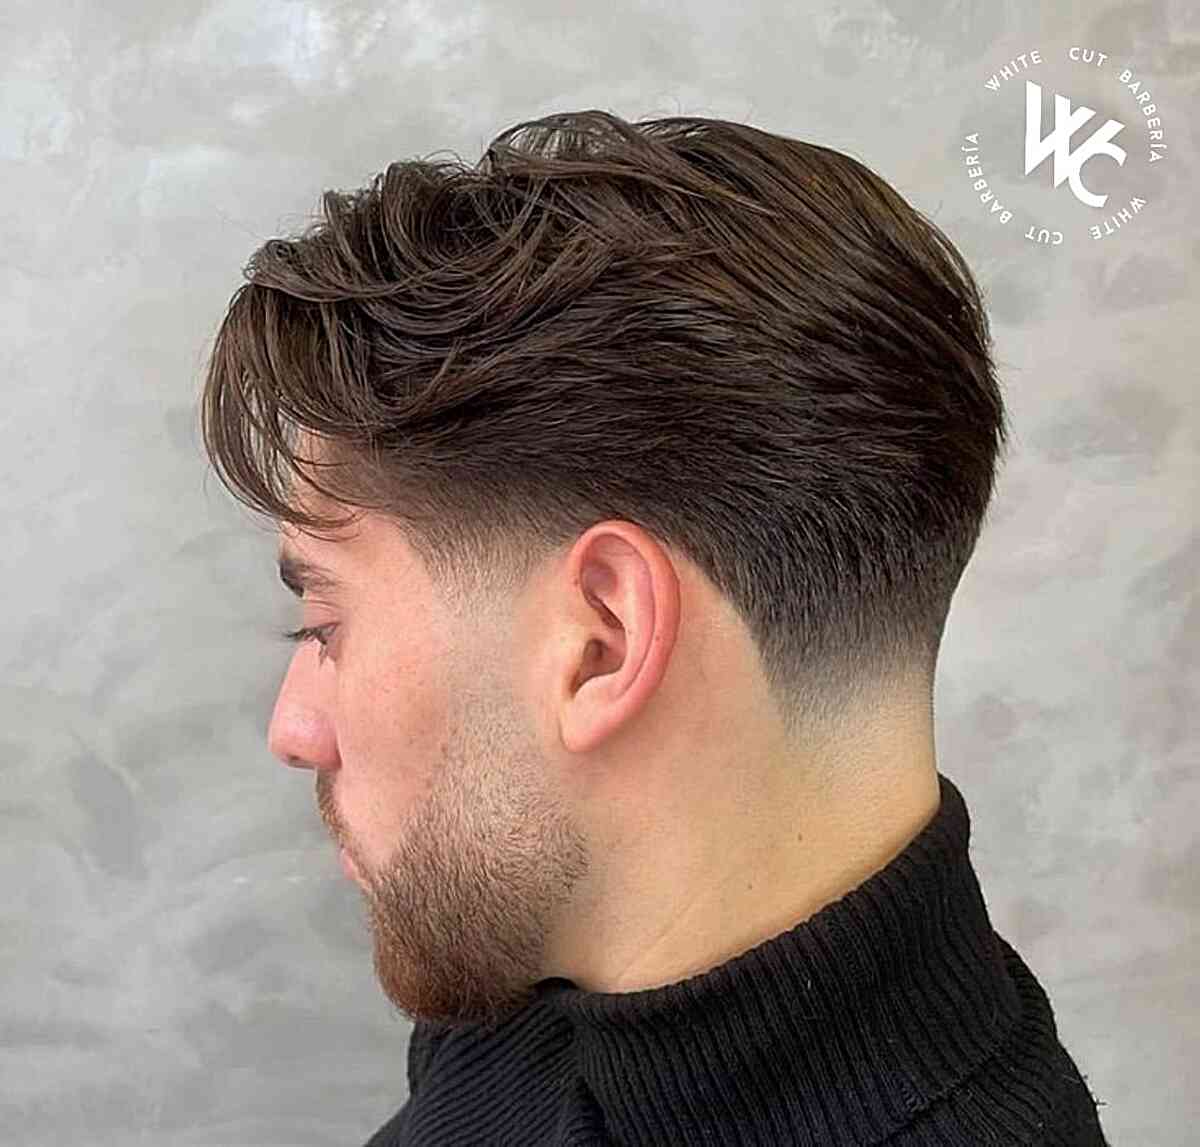
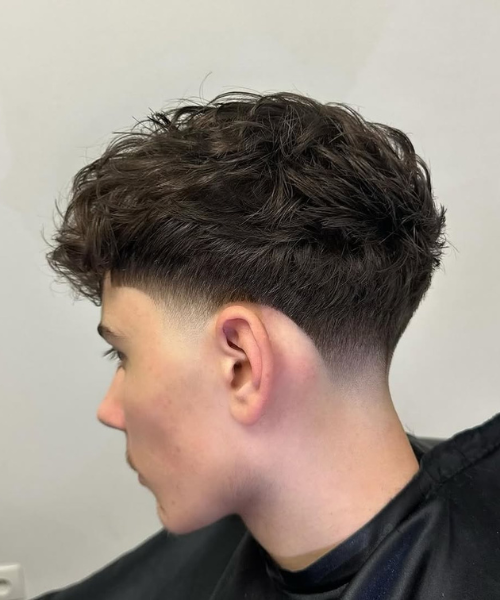
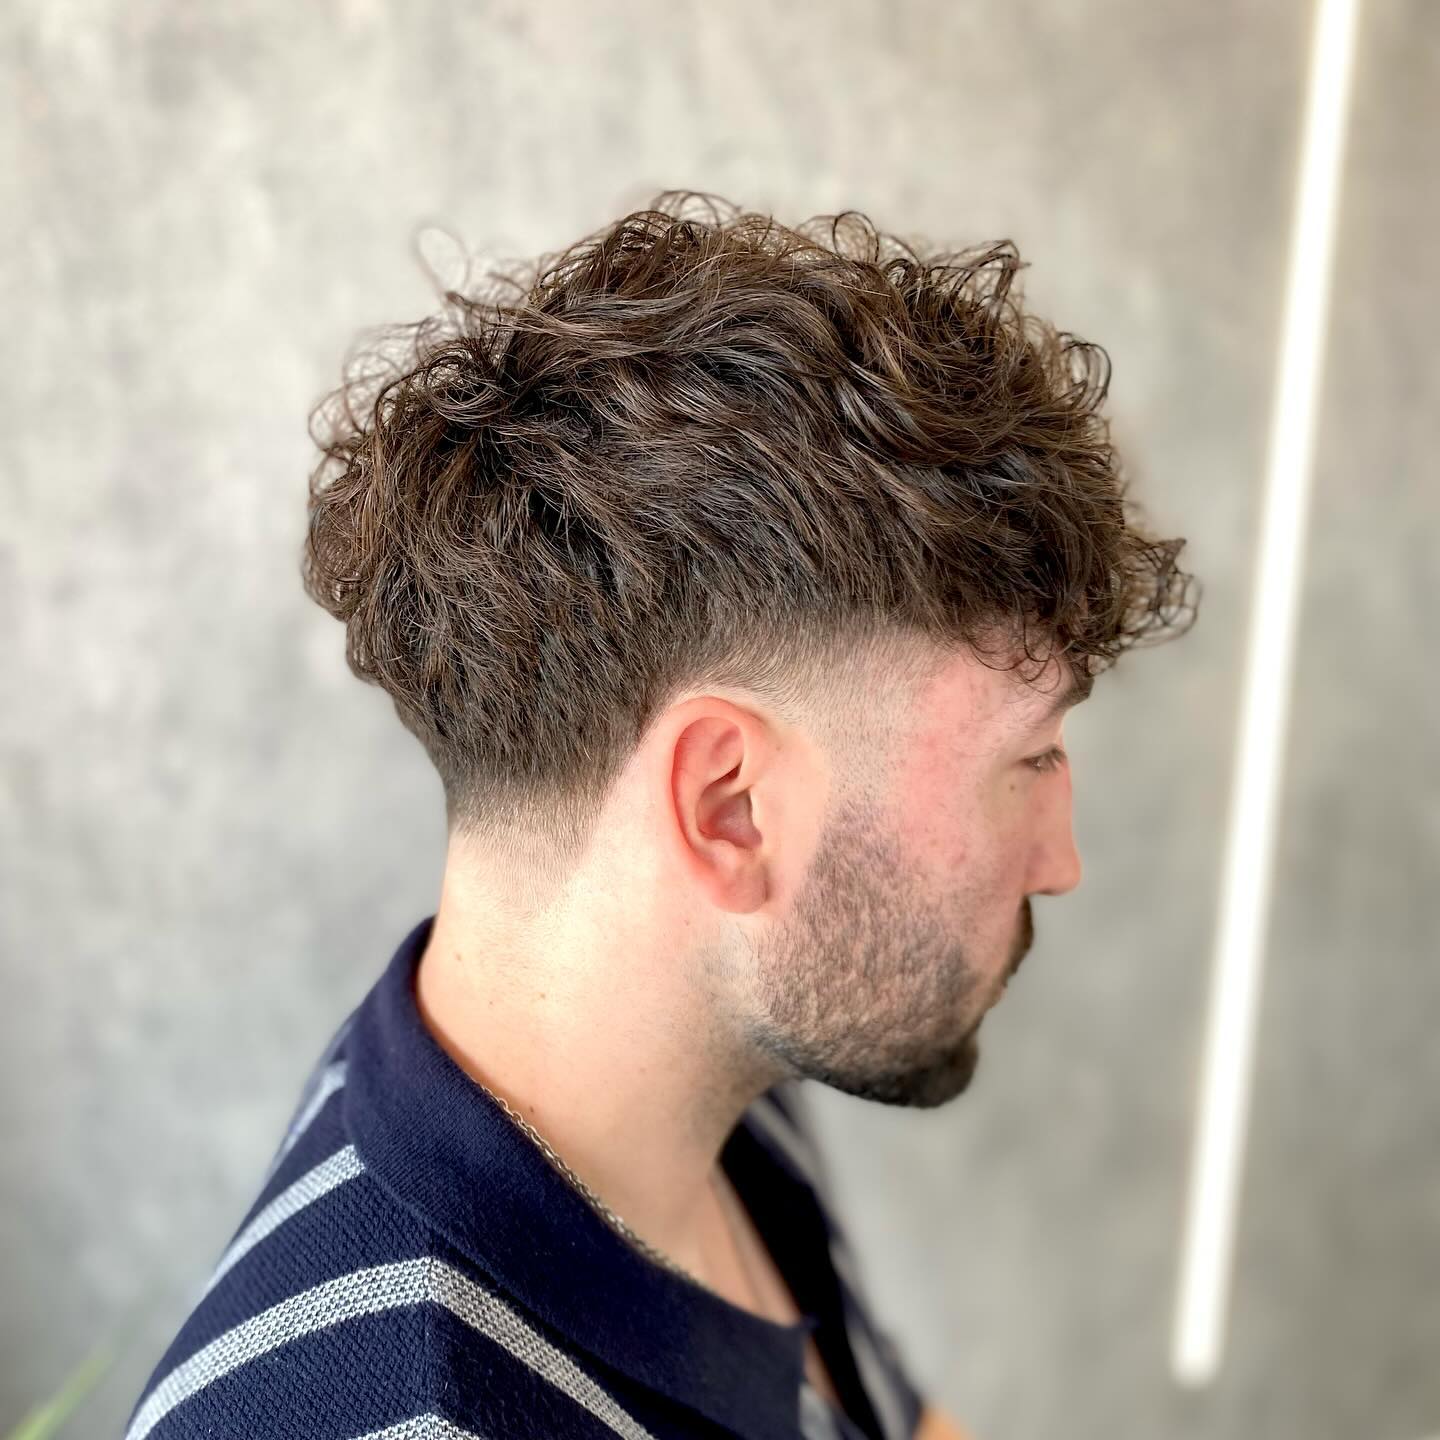
A mid taper fade for curly hair works by gradually shortening the hair on the sides and back, starting at the mid-point of the head. This technique preserves the volume on top while creating a clean, structured silhouette. The goal is a smooth transition that respects the natural curl pattern rather than fighting it.
1. Consult your barber on curl type
Curly hair behaves differently than straight hair. When dry, curls shrink, which can make a fade look higher than intended. Tell your barber your specific curl type—whether it is 3A waves or 3C coils—so they can account for shrinkage. This ensures the fade lands exactly where you want it, whether you prefer a sharp line or a softer blend.
2. Start with the clipper guard
Begin the cut with a lower guard number, such as a #1 or #2, on the bottom of the fade area. Use the clipper-over-comb technique to remove bulk without cutting too close to the scalp. This method gives you better control over the density, preventing the "mushroom" effect that can happen when curly hair is cut too short at the base.
3. Blend the mid-point transition
The defining feature of a mid taper is the blend around the temple and sideburn area. Switch to a #3 or #4 guard and use the clipper’s lever to open and close the blade, creating a gradient. Work slowly, checking the symmetry from both sides. The transition should be invisible to the naked eye, not a harsh line.
4. Refine the top and fringe
Once the sides are faded, move to the top. For curly hair, leave enough length on top to allow for styling. Use thinning shears to remove bulk without reducing length, which helps the curls lay naturally. Avoid cutting the fringe too short; curly hair needs weight to hold its shape.
5. Finish with a blowout taper
A blowout taper is essential for curly hair. Have your barber use a round brush and a blow dryer to stretch the curls and smooth the fade. This step reveals the true length and blend, allowing for final adjustments. It also trains the hair to lay in a direction that complements the fade.
Discuss your specific curl pattern (3A, 3B, 3C, or 4A) with your barber. This accounts for shrinkage and ensures the fade height is accurate when your hair is dry.
Use a #1 or #2 guard to start the fade. Employ clipper-over-comb to remove bulk safely, preventing the sides from looking too sparse or uneven.
Switch to a #3 or #4 guard. Use the clipper lever to create a seamless gradient at the mid-point of the head, checking symmetry frequently.

Leave length on top for styling. Use thinning shears to remove bulk without shortening the curls, maintaining the natural volume and shape.
Finish with a blowout taper. Stretch the curls with a round brush to reveal the true blend and train the hair for a polished, structured look.
Aftercare and maintenance
To keep a mid taper fade looking sharp, wash your hair with a sulfate-free shampoo to maintain moisture. Curly hair tends to dry out, which can make the fade look frizzy. Apply a light leave-in conditioner or curl cream daily. Visit your barber every two to three weeks to trim the faded sides before they grow out and lose their definition.


As an Amazon Associate, we may earn from qualifying purchases.
Fix common mistakes
The mid taper fade is a versatile cut, but curly hair demands specific handling to avoid a choppy or uneven result. The most frequent error is treating curls like straight hair during the fade process. When the barber uses the same guard length all the way around without adjusting for curl shrinkage, the transition becomes jagged rather than smooth.
Another common pitfall is cutting dry curls without accounting for their natural fall. Curls contract when dry, so a fade that looks even on wet hair might end up too short or uneven once it dries. Always ensure your barber styles the hair fully before the final blend check. This allows them to see exactly where the taper needs to be refined to match the natural volume of your curls.
Finally, neglecting the neckline can ruin the entire look. A mid taper fade relies on a clean, defined neck line to contrast with the textured curls on top. If the neck line is left fuzzy or uneven, the fade loses its sharpness. Ask for a clean, straight or slightly curved neckline that complements your jawline, ensuring the transition from skin to hair is crisp and intentional.
Mid taper fade curly hair: what to check next
Choosing a mid taper fade for curly hair often raises specific concerns about maintenance, styling, and how the cut interacts with different curl patterns. Below are the most common practical objections and how to handle them.
No comments yet. Be the first to share your thoughts!